
This article will show how to setup up the DynDNS service on the Hikvision recorders. The procedure is the same if you want to do a single camera. This paid DDNS service will update your dynamic IP anytime your ISP leases you a new one. Basically when you remote view your security system you’re accessing it via your external IP address, but most of the Internet Providers set a dynamic IP for their costumers, meaning your external IP address will change periodically. This DDNS service will keep track and update your domain every time your external IP changes.
Currently Hikvision supports two paid DDNS services: DynDNS and NO-IP. Technically both work the same way, however this article shows the steps for the DynDNS only. Some routers offer free DDNS, it’s a good idea to check your router settings to see whether there’s a free DDNS service there.
First step is to do the DynDNS hostname setup
1. Sign up or Login to your DynDNS account.
2. Go to My Services > DynDNS Pro to create a new hostname.
2. Go to My Services > DynDNS Pro to create a new hostname.
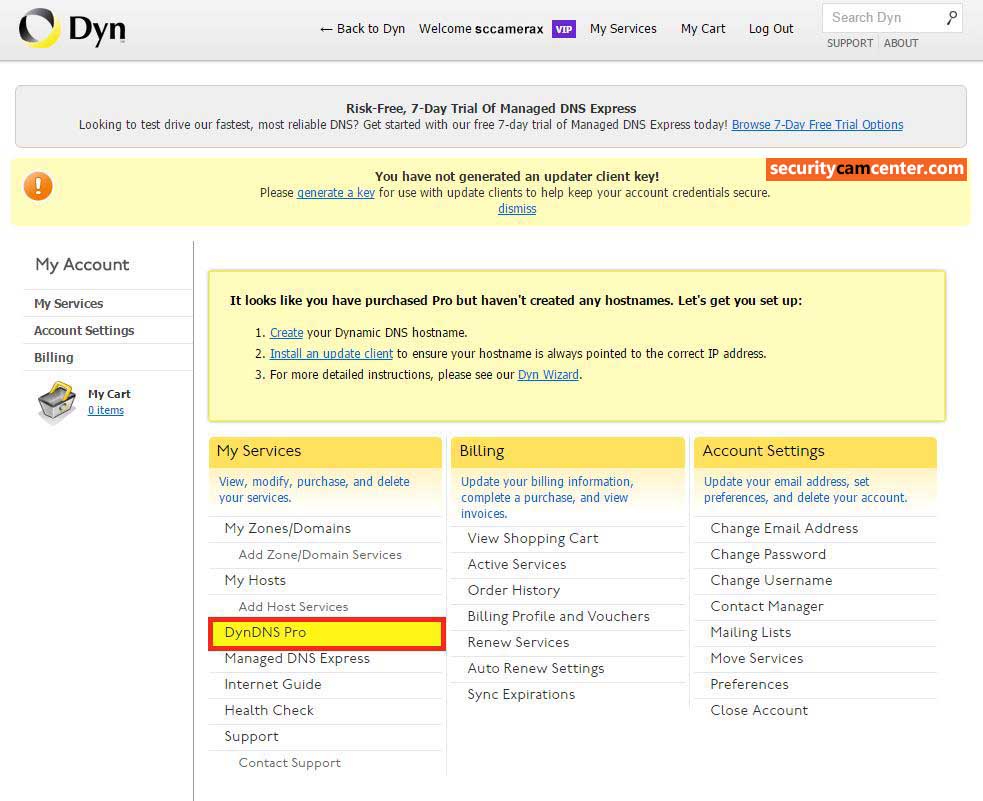
Go to DynDNS pro.
3. Press + Add New Hostname to create a new hostname.

Create a new hostname (domain).
4. Choose a hostname and domain. Service Type should be set to Host with IP address. The domain doesn’t have to be necessary dyndns.org, it can be another domain in their list. Your IP address will automatically be retrieved by this form.

Create you domain/hostname.
5. Press Activate to create the hostname. Your new hostname will be listed on the DynDNS Pro dashboard.

Here you’ll see your hostname (domain) listed.
DDNS setup for cameras/NVRs using web browser
1. Login to the device and proceed to the Configuration menu.
2. DDNS settings can be found in Network > Basic Settings > DDNS.
2. DDNS settings can be found in Network > Basic Settings > DDNS.
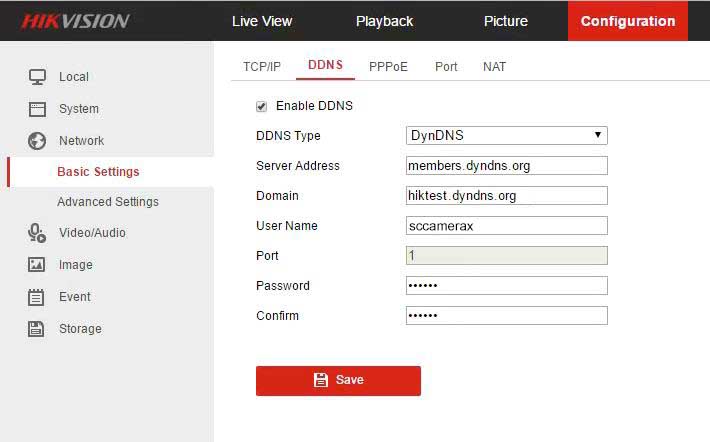
Enter the correct settings. If everything is set properly it should show the message “DDNS is normal”.
Check the box for Enable DDNS, and fill out the provided fields:
DDNS Type: DynDNS
Server Address: members.dyndns.org
Domain: your DynDNS hostname/domain
User Name: Your DynDNS username
Password: YourDynDNS password
3. Press Save to save your DDNS configuration.
DDNS Type: DynDNS
Server Address: members.dyndns.org
Domain: your DynDNS hostname/domain
User Name: Your DynDNS username
Password: YourDynDNS password
3. Press Save to save your DDNS configuration.
Update clients (software) provided by third party DDNS services are not required to be installed. The recorder/camera will update hostname information when a new IP address is allocated.
DDNS setup for NVRs/DVRs using GUI (local interface)
1. Use a mouse to login or unlock the device.
2. Access the device’s system settings using mouse right-click > Menu > System Configuration. Set the same settings as shown above. If everything is set up correctly, you should see the message “DDNS is normal”.
2. Access the device’s system settings using mouse right-click > Menu > System Configuration. Set the same settings as shown above. If everything is set up correctly, you should see the message “DDNS is normal”.
DDNS setup for cameras/NVRs/DVRs using iVMS-4200
1. Launch iVMS-4200. In Control Panel, go to Device Management.
2. In the Server tab, select your device and go to Remote Configuration.
3. DDNS configuration settings can be found under Network > DDNS. Then set the same DDNS settings as shown above.
2. In the Server tab, select your device and go to Remote Configuration.
3. DDNS configuration settings can be found under Network > DDNS. Then set the same DDNS settings as shown above.
Adding DDNS configured devices to the phone app iVMS 4500
1. Launch iVMS-4500 from your mobile device.
2. Open the menu by pressing the top left icon. Select Devices from the list.
2. Open the menu by pressing the top left icon. Select Devices from the list.
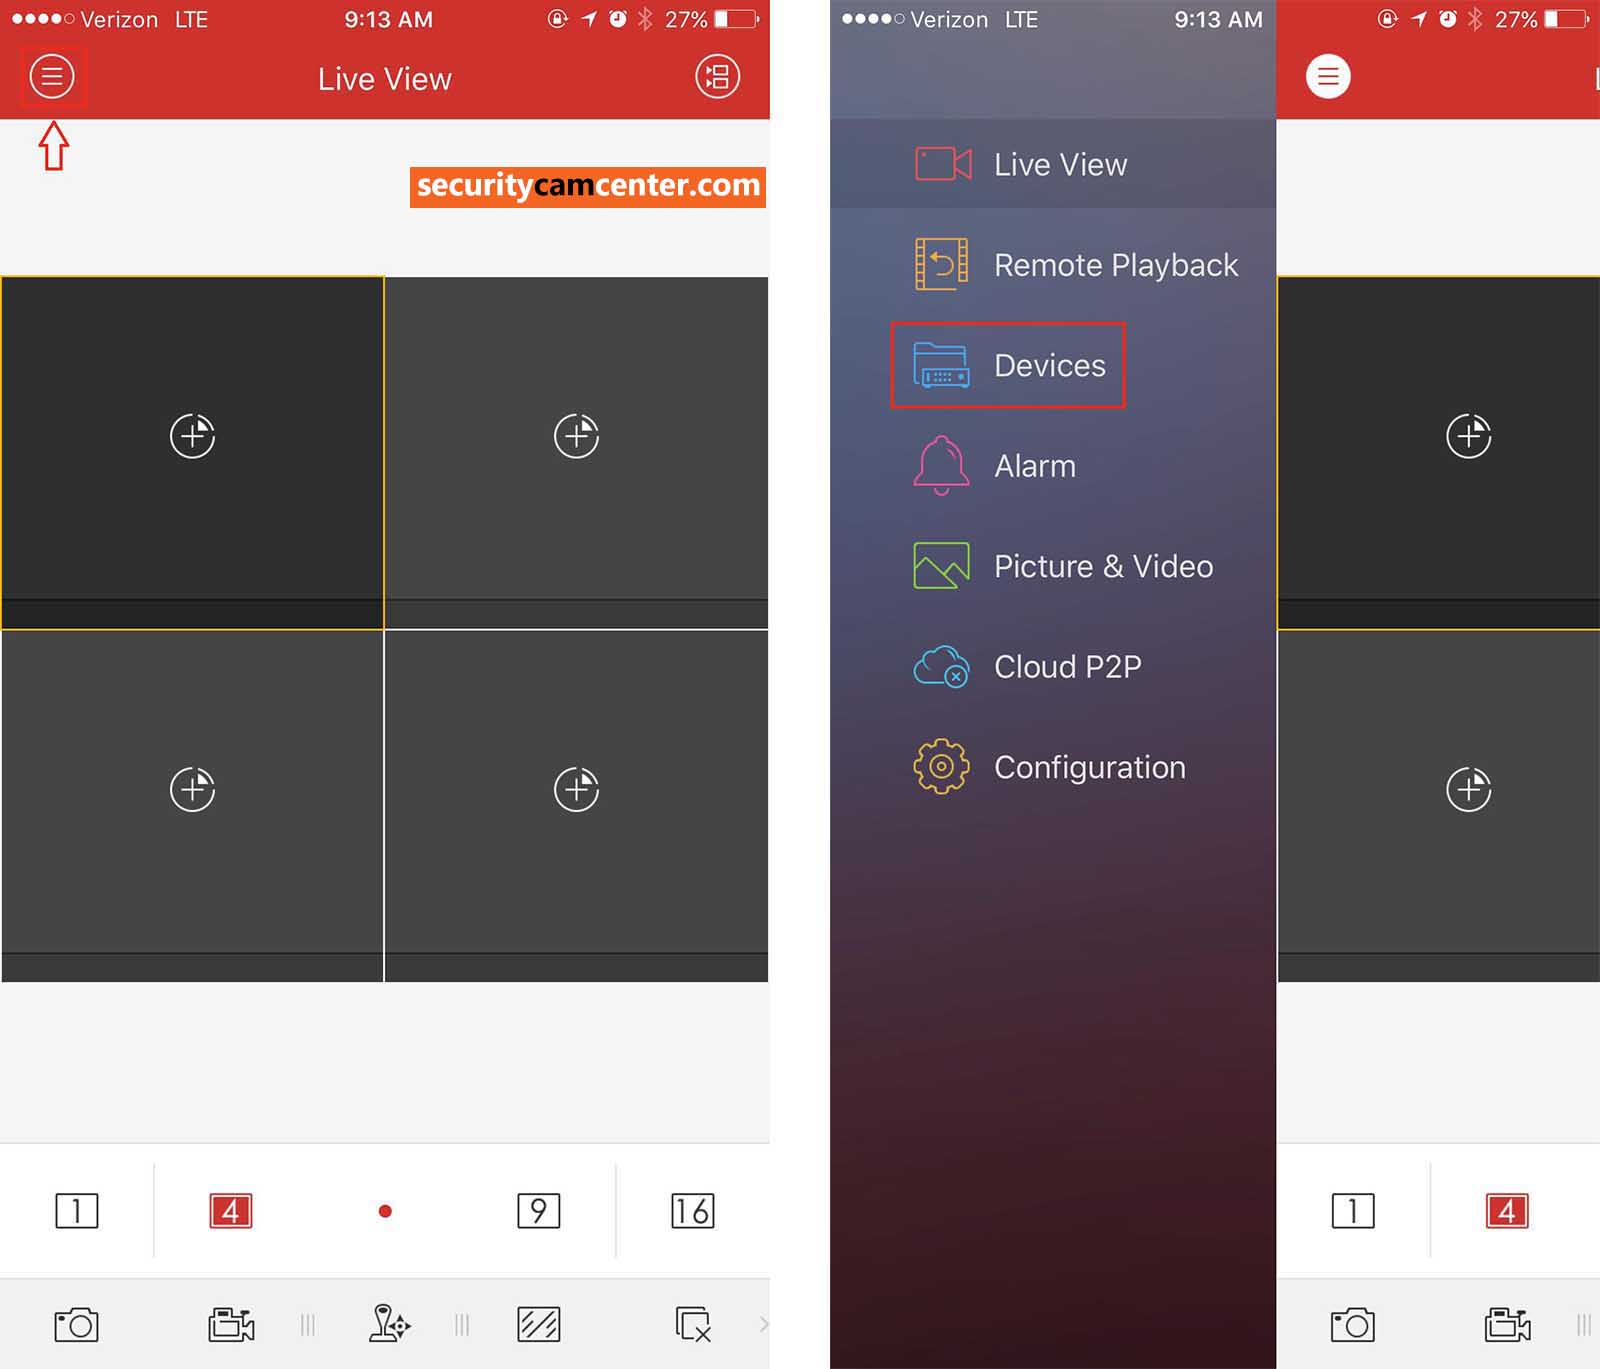
Open up the app on the phone and go to Devices.
3. The device list will be displayed on this screen. To add a DDNS configured device, press [+] and use the Manual Adding option.
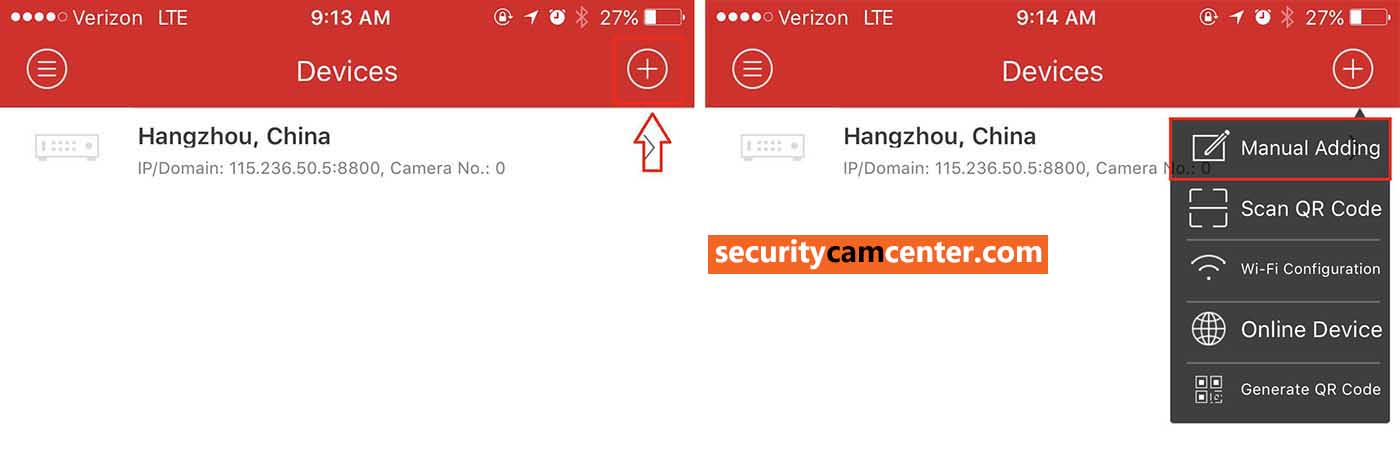
Click Manual Adding.
4. Fill out the following information regarding your DDNS configured device:

Fill out the correct information.
Alias: Set a nickname for your device
Register Mode: IP/Domain
Address: Hostname/domiain created from your DDNS account.
Port: Default value is 8000. This port need to be opened in your router.
User Name: Username for device
Password: Password for device
Register Mode: IP/Domain
Address: Hostname/domiain created from your DDNS account.
Port: Default value is 8000. This port need to be opened in your router.
User Name: Username for device
Password: Password for device
After you do all of this click Save and then you can live view your cameras. It’s necessary to have the server port (default 8000) opened on your router otherwise you’ll get a “failed to connect”.


1 Comments
good
ReplyDelete